Managing POS
To manage point of Funnels, follow the steps given below.
1. Navigate to the Flows option in the Side Bar.
The Flows page will be displayed.
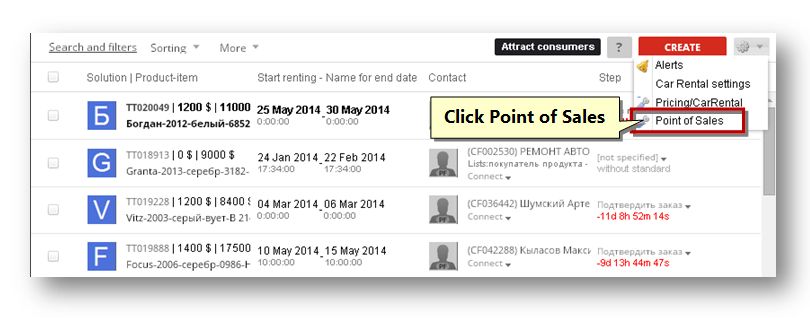
2. Select the Point of Sales option from the Settings (![]() ) drop down list.
) drop down list.
The Point of Sales page will be displayed.
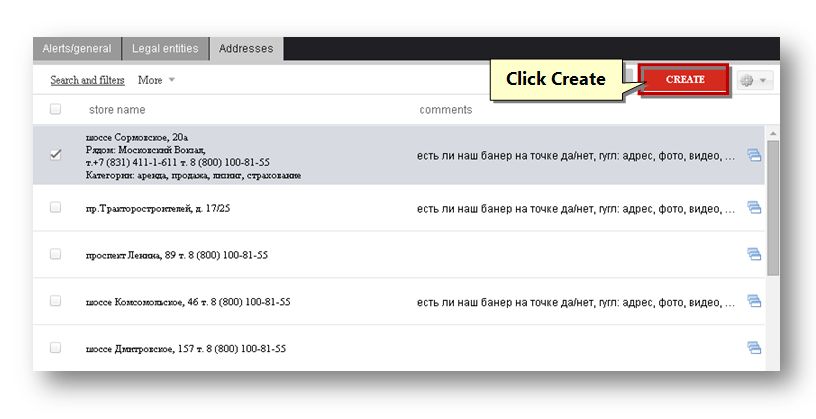
3. To create new sell store, click the Create button.
The Create Sell Store page will be displayed.
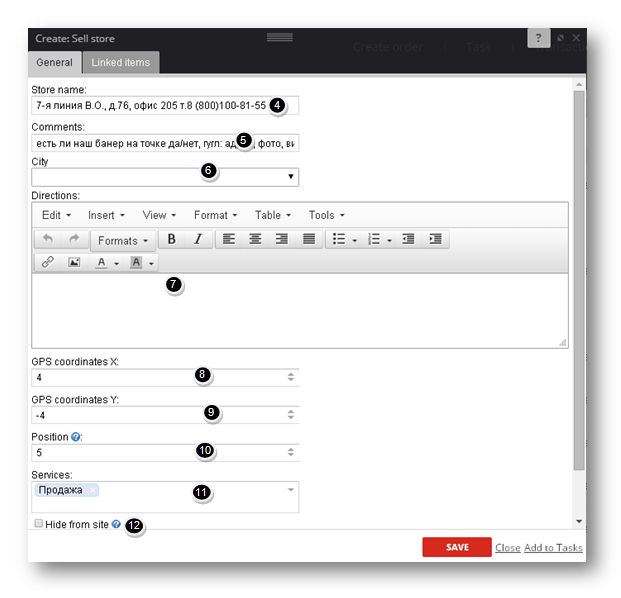
4. In the General section, enter the name of the store in the Store Name text entry box.
5. Enter the comments if any, in the Comments text entry box.
6. Select the name of the city from the City drop down list.
7. Enter the direction details in the Directions field.
8. Set the value for x co-ordinates in the GPS Co-ordinates X field.
9. Set the value for y co-ordinates in the GPS Co-ordinates Y field.
10. Set the value for position in the Position field.
11. Select the type of service from the Services drop down list.
12. Select the required option. The available options are Hide from Site, Office, Sell Store and Warehouse.
13. Navigate to the Linked Items section.
The Linked Items section of the page will be displayed.
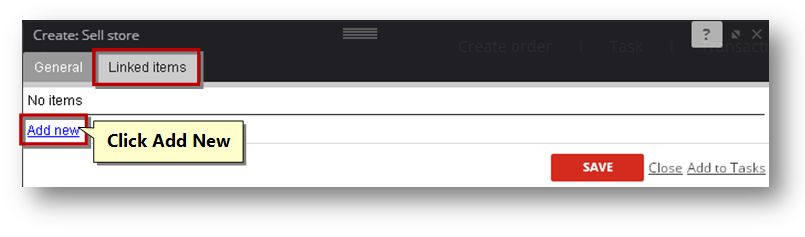
14. Click the Add New link.
The Link Item section of the page will be displayed.
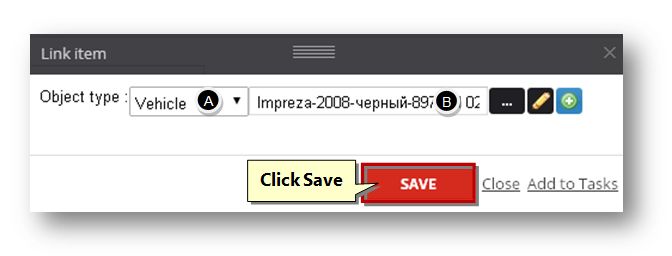
A. Select the type of the object from the Object Type drop down list. The available options are Funnels, Vehicle, Client, Call, Task, Invoice, Payment, Material and File.
B. Select the name of the object by clicking the Browse (![]() ) button.
) button.
The page will be displayed based on the selected criteria.
C. Select the object that you wish to select and click the Select button.
The selected object will be added to the field.
D. Click the Save button.
The selected file will be added to the linked items section.
E. Click the Save button.
The new sell store record will be created.
23. You can also edit the sell store record. To do so, click the name of the sell store record that you wish to edit.
The selected record will be displayed on the edited mode.
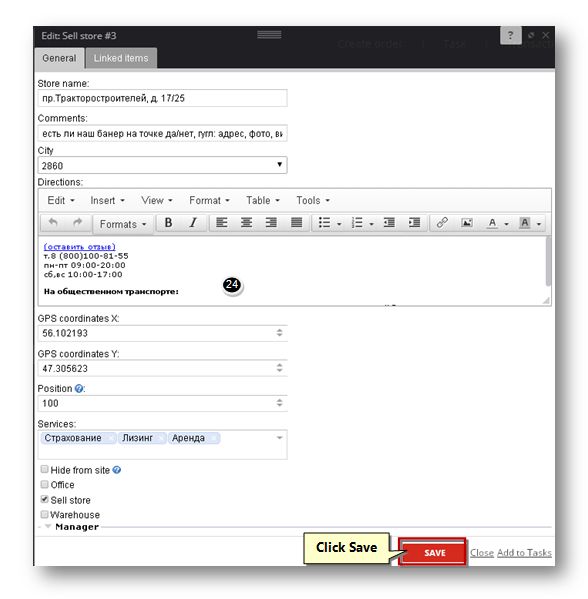
24. From here you can make the necessary changes you wish to change in the sell store record and click the Save button.
The changes made to the sell store record will be saved.
25. You can also create return stores on the POS page. Click the Return Stores (![]() ) button.
) button.
The Return Stores page will be saved.
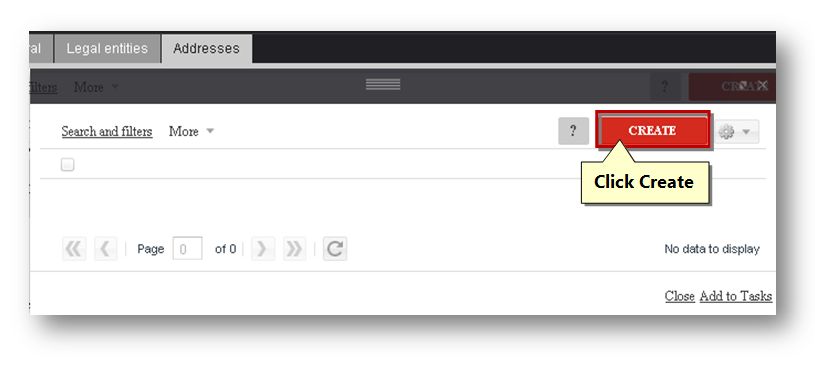
A. Click the Create button.
The Create ReturnStore page will be displayed.
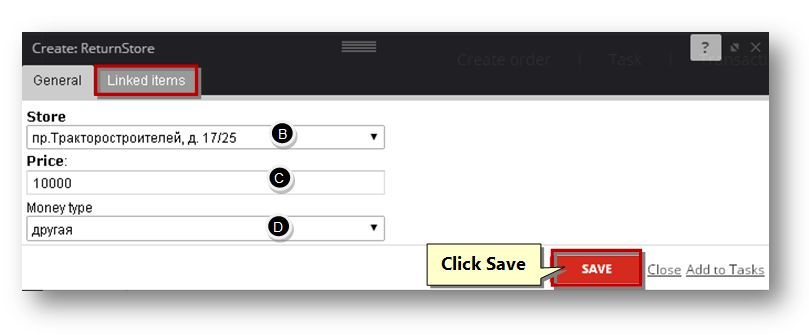
In the General section, select the type of the return store from the Store drop down list.
B. Enter the price in the Price text entry box.
C. Select the type of the money from the Money Type drop down list.
D. Navigate to the Linked Items tab.
The Linked Items section of the page will be displayed.
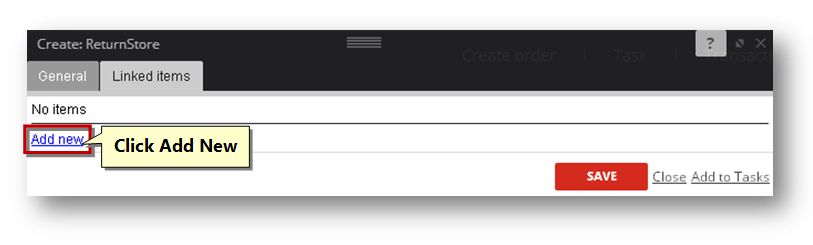
F. Click the Add New link.
The Link Item section of the page will be displayed.
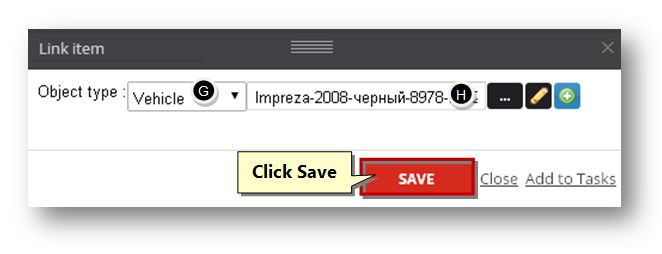
G. Select the type of the object from the Object Type drop down list. The available options are Funnels, Vehicle, Client, Call, Task, Invoice, Payment, Material and File.
H. Select the name of the object by clicking the Browse (![]() ) button.
) button.
The page will be displayed based on the selected criteria.
I. Select the object that you wish to link and click the Select button.
The selected object will be added to the field.
J. Click the Save button.
The selected object will be linked.
K. Click the Save button.
The new return store record will be created.
Sponsored from PaperFree Magazine:
.jpg)
Real Estate Investment Principles by Billionaire Bruce Flatt
Copyright © 2022 PaperFree.com Inc. All rights reserved and data products are owned and distributed by PaperFree.com Inc. and its subsidiaries. | About | Feedback | All Contacts | ID: 979-446-8934 S/N 78675-0 | SID 487999-3 | Version 5.2 Powered by PaperFree.com | Legal