Editing Your Profile
To edit your profile, follow the steps given below.
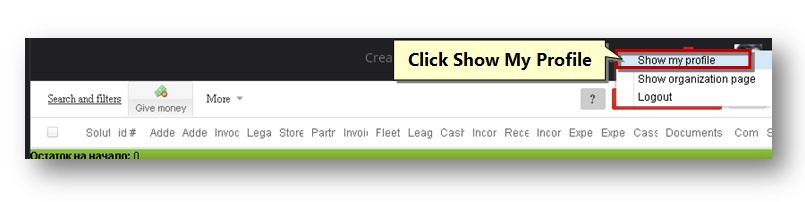
1. Navigate to the Show My Profile option in the topmost right corner.
The Manage Users page will be displayed.
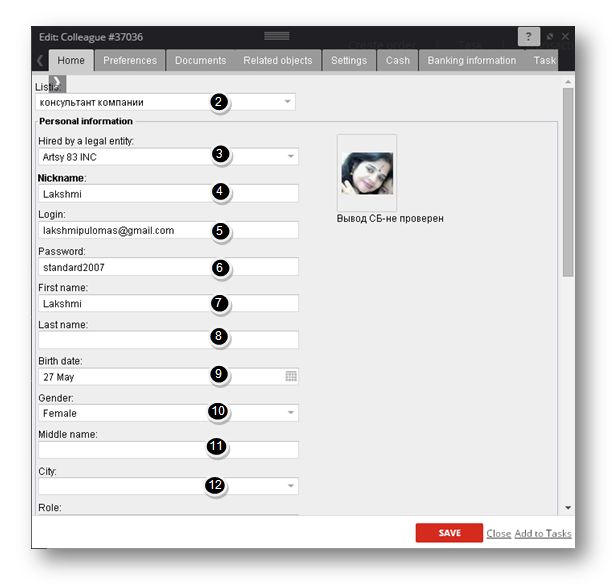
2. In the Home section, select the list form the Listis drop down list.
3. Select the name of the employer from the Hired by a Legal Entity drop down list.
4. Enter/Edit the name in the Nickname field.
The Login field is automatically populated.
5. Enter/Edit the password in the Password text entry box.
6. Enter/Edit your first name in the First name text entry box.
7. Enter/Edit your last name in the Last name field.
8. Select your date of birth from the Birth Date calendar.
9. Select your gender from the Gender drop down list.
10. Enter/Edit your middle name in the Middle Name text entry box.
11. Select the name of the city from the City drop down list.
12. Enter/Edit the role name in the Role text entry box.
Scroll down to more options.
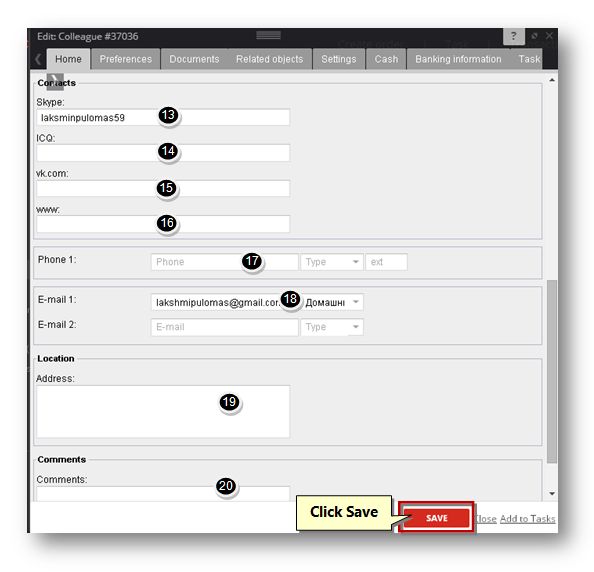
13. Enter/edit the Skype address in the Skype text entry box.
14. Enter/edit the ICQ code in the ICQ text entry box.
15. Enter/edit the vk.com address in the vk.com text entry box.
16. Enter/edit the web address in the www text entry box.
17. Enter/edit the phone number in the Phone text entry box and select the type of the phone number from the next drop down list and enter the extension number if any, in the respective field.
18. The Email field will be automatically populated.
19. Enter/edit your address in the Address text entry box.
20. Enter/edit the comments if any, in the Comments text entry box.
21. Navigate to the Preferences tab.
The Preferences section of the page will be displayed.
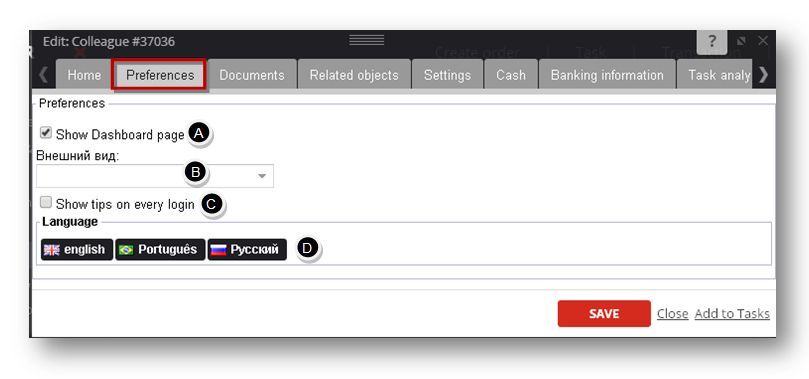
A. Specify whether dashboard page can be shown or not by checking or un-checking the Show Dashboard Page option.
B. Select the theme from the drop down list. Currently the available theme is Neptune.
C. Specify whether tips to be displayed on every login or not by checking or un-checking the Show Tips on Every Login field.
D. Select your language from the available options.
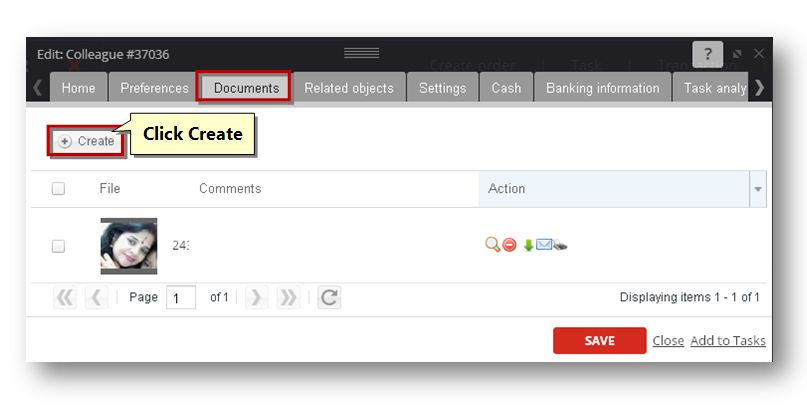
22. Navigate to the Documents tab.
The Documents section of the page will be displayed.
The Documents section of the page will be displayed.
A. To create a new document, click the Create button.
The Upload File page will be displayed.
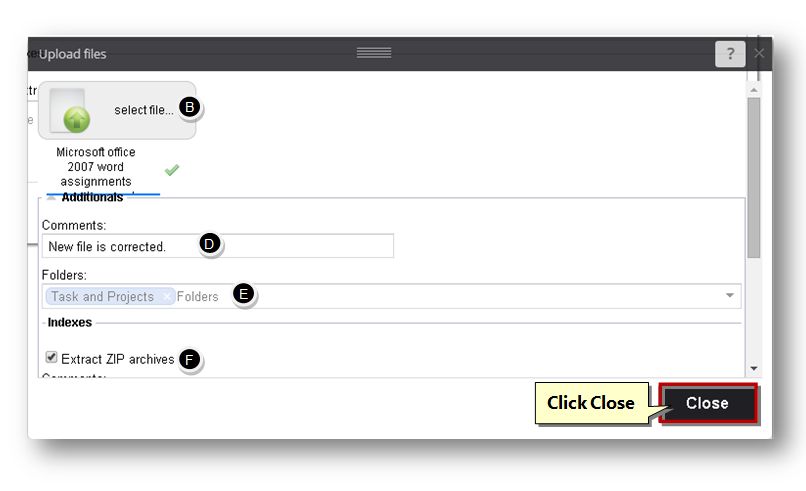
B. Click the Select File button.
The standard Open dialog will be displayed.
C. Select the file that you wish to upload and click the Open button.
The selected file will be uploaded to the Upload Files section.
D. Enter the comments if any, in the Comments text entry box.
E. Select the folder from the Folders drop down list.
F. In the Indexes section, specify whether you wish to extract zip archives or not by checking or un-checking the Extract ZIP Archives option and also, you can setup custom Indexes, if needed.
G. Click the Close button.
The selected document will be uploading to the Document section.
23. Navigate to the Related Objects tab.
The Related Objects section of the page will be displayed.
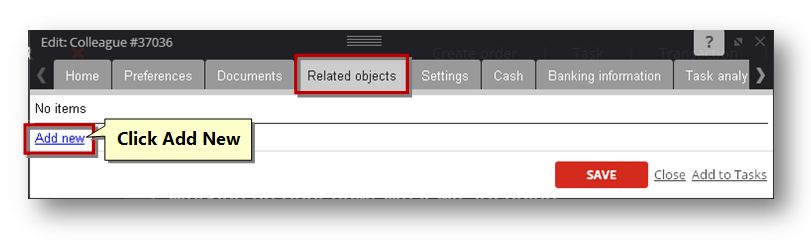
A. Click the Add New link to add new related objects.
The Link Item section of the page will be displayed.
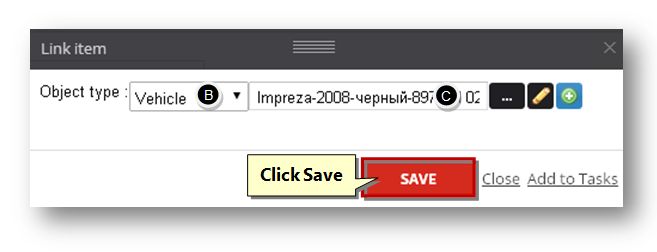
B. Select the type of the object from the Object Type drop down list. The available options are Sales, Vehicle, Client, Call, Task, Invoice, Payment, Material and File.
C. Select the name of the object by clicking the Browse (![]() ) button.
) button.
The related object page will be displayed based on the selected criteria.
D. Select the object that you wish to link and click the Select button.
The selected object will be added to the field.
E. Click the Save button.
The selected object will now be linked.
24. Navigate to the Settings tab.
The Settings section of the page will be displayed.
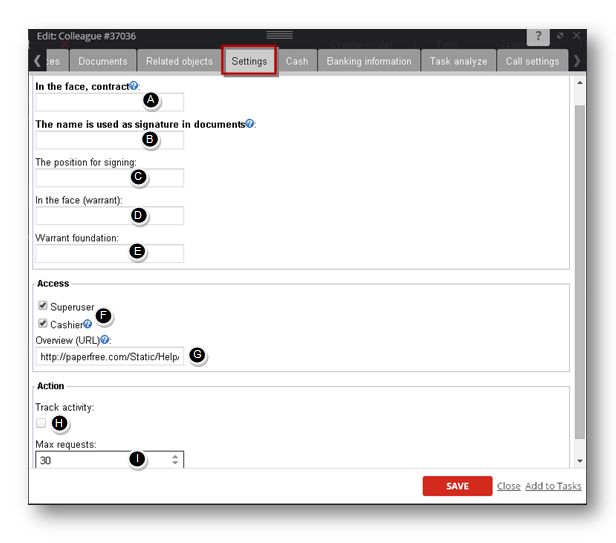
A. Enter the name in the contracts or warrants in the Face, Contract text entry box.
B. Enter the name that is used as signature in documents in the Name is Used as Signature in Documents section.
C. Enter the position for signing in the Position for Signing text entry box.
D. Enter the warrant name in the Face Warrant text entry box.
E. Enter the name of the warrant foundation in the Warrant Foundation text entry box.
F. Specify the type of access by selecting the required option. The available options are Super User and Cashier.
G. The Overview URL field will be automatically populated.
H. Specify whether the activity can be tracked or not by checking or un-checking the Track Activity text entry box.
I. Set the maximum number of requests that can be made in the Max Requests field.
25. Navigate to the Cash tab.
The Cash section of the page will be displayed.
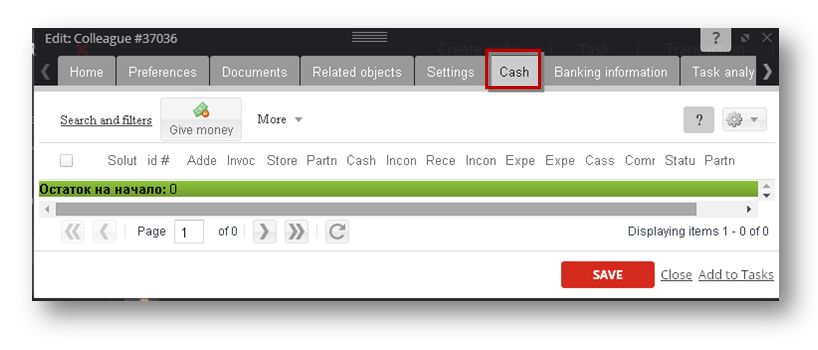
For managing cash and finances, refer to the Manage Finance and Accounting section.
26. Navigate to the Banking Information tab.
The Banking Information section of the page will be displayed.
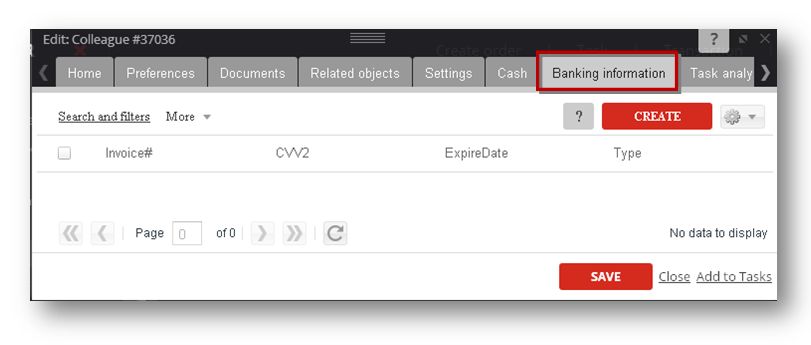
For managing bank information, refer to the Manage Finance and Accounting section.
27. Navigate to the Task Analysis option.
The Task Analyze section of the page will be displayed.
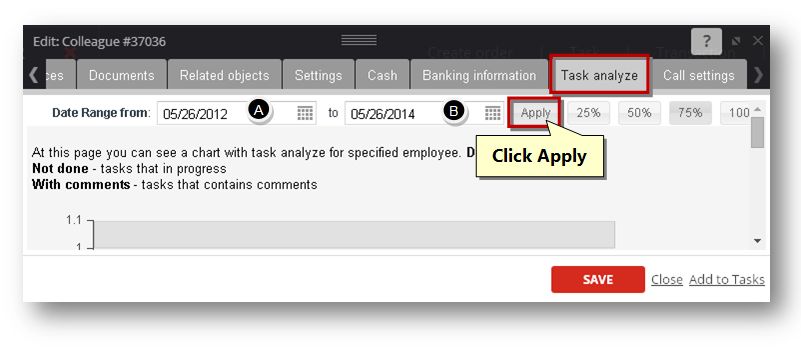
From here you can view or analyze the task and its details for the desired period.
A. Select the starting period to analyze task from the Date Range From calendar.
B. Select the ending period to analyze task from the To calendar.
C. Click the Apply button.
The task chart will be displayed.
28. Navigate to the Call Settings tab.
The Call Settings section of the page will be displayed.
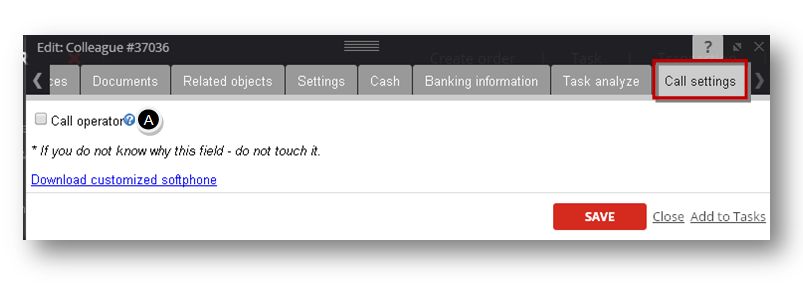
A. To enable notifications about new calls for selected employee check the box in the Call Operator field.
The Feedback page will be displayed.
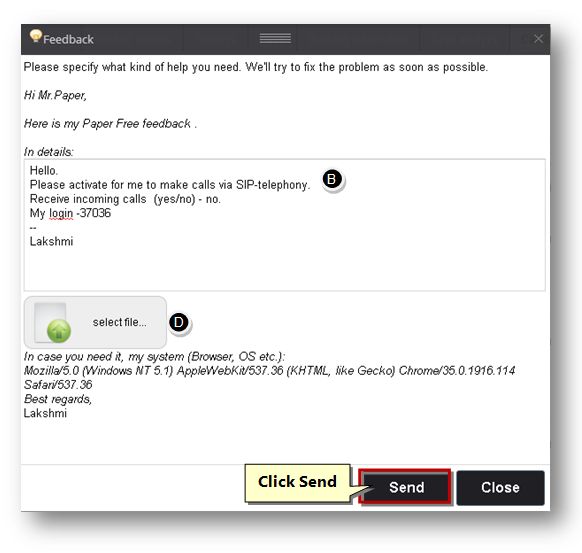
B. In the Details section, you can enter the details of the help that you need.
C. To attach any document, select the file by clicking the Select File button and select the file from your computer.
D. Click the Send button.
Your request will be sent.
29. Click the Save button.
The changes made to your profile will be updated.
Sponsored from PaperFree Magazine:
.jpg)
Real Estate Investment Principles by Billionaire Bruce Flatt
Copyright © 2022 PaperFree.com Inc. All rights reserved and data products are owned and distributed by PaperFree.com Inc. and its subsidiaries. | About | Feedback | All Contacts | ID: 979-446-8934 S/N 78675-0 | SID 487999-3 | Version 5.2 Powered by PaperFree.com | Legal